Amigurumi truly brings life to yarn. The crocheted creatures can look complex when they are complete, but creating amigurumi is straightforward if you know your crochet basics. Whether you are new to crocheting or a seasoned expert, here is what you need to know to begin crocheting amigurumi!
What is amigurumi?
The craft of creating dolls by knitting or crocheting is called amigurumi. The word, “amigurumi,” comes from Japanese for knitted or crocheted stuffed dolls. While it is possible to create amazing creating with two knitting needles, a crochet hook is a little more nimble and can more easily create 3D shapes.

How is amigurumi made?
Creatures are made in parts. The arms, legs, body, head, ears – and any of real or imaginary body part – are usually crocheted separately, stuffed with polyester stuffing and then joined by sewing them together with yarn.
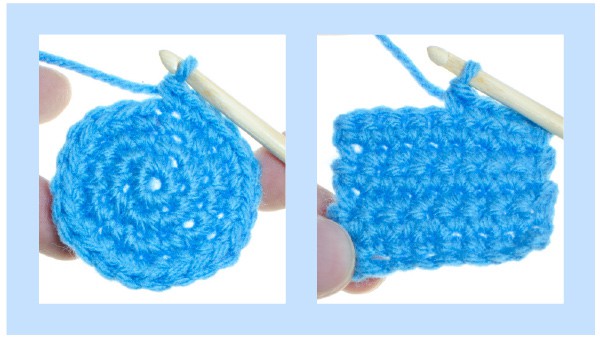
Most pieces are created by crocheting in the round. A magic ring is a great way to start, and then different shapes can be made with increasing or decreasing the number of stitches. Even flat pieces can be made in the round. For example, ears can be created by making a bowl-shaped piece and flattening it into a flat ear. This adds strength and definition to the ear while hiding the row bulges that are characteristic of crocheting in rows.

Crochet rounds and crochet rows. Most amigurumi pieces are created in the round.
Amigurumi basic techniques
Here are the essentials of what you need to know to begin an amigurumi adventure! Other techniques (like other stitches) are useful, but amigurumi is based on two main techniques:
Single crochet
Most stitches used in crochet are single crochet. In fact, double or triple crochet stitches are very rare. Single crochet creates tight and even stitches – perfect for keeping in stuffing and holding the shape! Here is a short video tutorial for single crochet.
Magic ring crochet start
The magic ring creates a tight loop. It is the start to crocheting in the round and is used to begin nearly every part of an amigurumi creature. Master the magic ring with the help of this video!
Supplies and materials
Like all crochet projects, the basic amigurumi supplies are a hook and yarn.
Hook
Amigurumi stitches need to be tight to hold the shape and keep stuffing in, so use a hook that is a few sizes smaller than the yarn recommends.
We recommend using a 4.5 mm hook with medium worsted yarn. Bigger sizes will create larger and floppier creatures, while tighter hooks will make a finished product that is rigid but holds its shape. Whatever hook size you choose, keep the yarn tension tight. This will help create rigid stitches.
Yarn
For yarn, acrylic is ideal because it can hold its shape and comes in many fun and wild colors. Acrylic yarn is also hypoallergenic and machine washable – great if your amigurumi creatures will be gifts for kids!
Other supplies
Creatures are stuffed with polyester stuffing before they are sewn up. We also use any yarn scraps for stuffing – it gives the creatures yarn intestines! Stuff them until they are firm (or less if you want a floppy final result).
Beads or safety eyes are let the creatures see. Beads can be difficult to judge when to loop them into the yarn, so safety eyes are highly recommended. Best of all, safety eyes are very secure and safe for kids.
Felt resembles fine fur and adds a nice embellishment around eyes and eyes. And yarn scraps can be embroidered on for noses.
Breaking it down – amigurumi in pieces
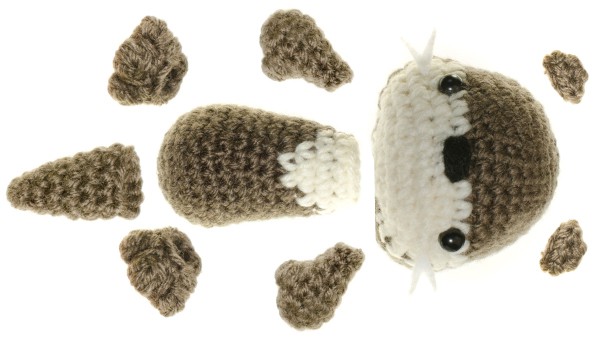
The easiest way to visualize how an amigurumi creature is made, is by seeing all the separate pieces.
Here is the river otter pattern from The Crochet Wildlife Guide:

The pieces of an amigurumi otter – from The Crochet Wildlife Guide
All pieces are created by crocheting in the round. Even the tiny ears are made in the round – they are a flattened disc! Each piece is created individually and then sewn together. It looks like a lot of pieces, but each piece doesn’t take long to create! The finished product is an otter that is ready for the river!
The amigurumi toolbox
With just a hook and yarn, you can begin your journey to crocheting animals from around the world or beyond! Amigurumi only requires basic crochet skills – if you are a crochet master, picking up amigurumi will be quick. Just create one piece at a time and sew it all together at the end. If you are new to crocheting, practice your single crochet and you can quickly move on to making creatures!
Visualizing amigurumi
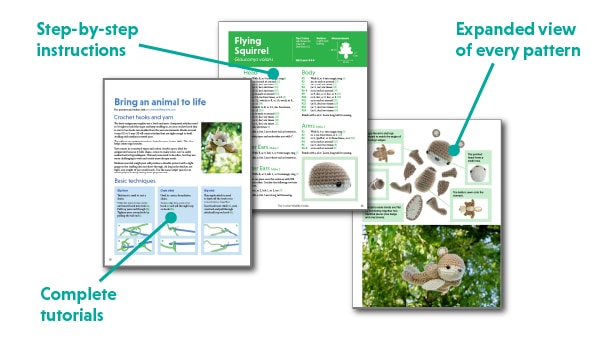
Seeing is a great way to learn. The Crochet Wildlife Guide includes images and illustrations of all the techniques – from single crochet to more advanced stitches. Every pattern is broken down into the individual pieces and illustrations show how each piece fits into the bigger picture.

Pick up the book from Amazon or download an ebook or PDF to begin your amigurumi journey!
